Saturday, October 22, 2011

This is why I love vinegar.

Can I just say how awesome vinegar is? It's seriously amazing stuff. I use it to to make my hair super soft and shiny (while in the shower, add some apple cider vinegar to your hair with shampoo and you'll see what I mean) and clean with, so when I saw a pin originally from www.craftylittlegnome.blogspot.com showing how to use vinegar steam to clean your microwave I couldn't wait to try it!


My microwave was in serious need of my attention anyway since I usually put off cleaning it until it looks like the scene of a very grisly bean/spaghetti massacre as you will see, so this was perfect timing.


I wish I could say that what you are about to see is the result of me intentionally messing my microwave up to show how awesome this vinegar tip works, but sadly, it is just the result of no one bothering to cover their food (me included) and letting it explode all over the inside, which I guess is better for the sake of this experiment.


This is my microwave before.
 Don't judge me!!! You don't know my lyfe!!!11!


I put a bowl filled about 2/3 water and 1/3 vinegar inside, and "cooked" it for five minutes on high. When it was done, I wanted to see just how easy this was, so I took a dry paper town and gently wiped down one side.


It came off so easily, I couldn't believe it!

At that point, I ditched the paper towel, grabbed a kitchen rag, and went to town wiping my microwave down which was oddly fun. cleaning would be so much more fun if it was always this easy. I love seeing things go from a disastrous mess to sparkly clean, and it's even more gratifying when it doesn't take forever or require tons of work.


Here is my beautiful microwave which only took me ten minutes to clean!

Can you believe that?! There was absolutely no scrubbing involved, just wiping and rinsing out my rag (I did take the plate out and washed it off in the wink with soapy water). I will never scrub or use harsh chemicals on my microwave again, thank you Pinterest!


Want to be brave and show us your vinegar steam cleaned microwave too? Upload your before and after pictures!

Thursday, October 20, 2011

Watch out, there's a trash can on the loose!

This week's post is going to be short and sweet, sorry, but my entire family (including myself) has been sick with a nasty stomach virus, the details of which I will spare you (with two kids, imagine LOTS of poop and vomit and you get the idea).

I thought I'd share my experience with the pin about the plastic cereal container converted into a trash can for you car.


I soooooo wanted to love this, especially since my car desperately needs a trash can, and I really do like it except for a couple of things. One, if you have a small 4 door car like my Dodge Neon, then sitting in the passenger side with that at your feet is annoying, and two, the second you start to turn the car, that thing is all over the place. I tried to get over those two things for a couple of weeks, but finally threw it in the back where I can't reach it from the driver or passenger seat so it can't be of use, but at least it's not about drive me insane (although the messiness of my car is).

I wouldn't leave you without a possible solution though, and I think I have one. I'm just going to make a loop of fabric, stick one end under the cereal container lid to secure it, and loop the other end around the gear shift. It may not keep it totally out of the way of the person on the passenger side, but I'm pretty sure that will at least hold it in place and let me keep my sanity. I'll post pictures and let you know how it turns out.

See? Short and sweet:). Pretty sure next week I can show you all about my yarn wreath making skillz, so stay tuned!

If you have any suggestions, a cereal container turned car trash can success story, or just want to show off your craftiness, leave a comment or a picture!

Wednesday, October 12, 2011

Wreaths are not made from pipe insulation for a reason.

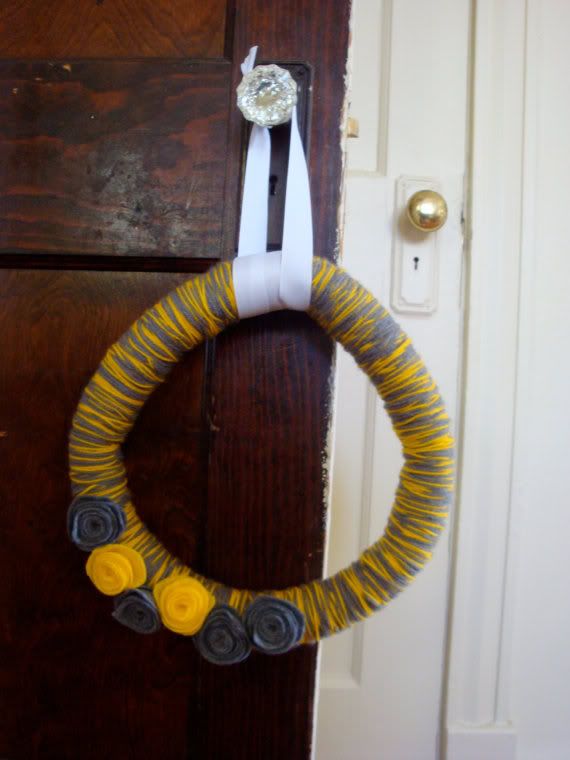
I'm sure you've seen the beauitful yarn and felt wreaths all over Pinterest.


This is one of my favorites, and I am dying to try and make one.


My problem right now is finding a foam wreath form. For some reaon all the craft stores around me are out. Grrrr!


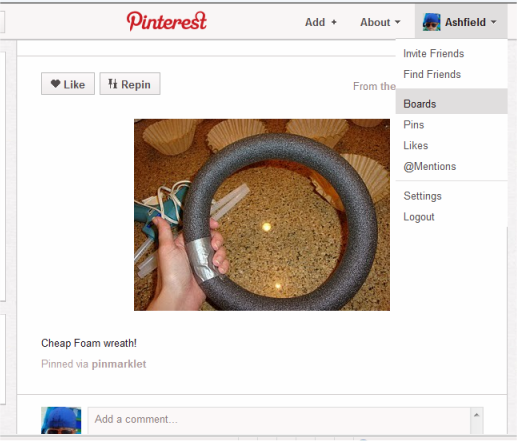
I was getting pretty frustrated, but then I stumbled upon this pin explaining how you can just use pipe insulation from the hardware store and duct tape. Cut the pipe insulation to your desired lenth, then tape the ends together for a cheap (less than $2) foam wreath form!


This was me when I saw this "awesome" tip.


I ran to the Home Depot down the street and bought a 6ft long pipe insulator and got back home as fast as I could. I was SO excited to get home and get started with my awesome beautiful yarn wreath!

The verdict?!

Keep the pipe insulation on the pipes guys. My wreath turned out a weird tear drop shape instead of round, plus they're pretty flimsy so I highly doubt they would store well.

I didn't take any pictures of the one I made (I hadn't come up with my blog idea yet or I would have), I didn't even bother to cover it with yarn, but if I had, this is what it would have looked like...

Not so great right?

I still had some trouble hunting down some foam wreath forms the right size and thickenss (I like them a little thicker), so I actually ordered straw wreaths for about $3.50 each from joanns.com. They should be here in about a week, and I will post my results when I get them!


*I want to add that my original inspiration for wanting to make one of these wreaths was seeing a beautiful bumble bee inspired wreath my friend Amber made:).


If you have any suggestions, a pipe insulation turned wreath success story, or want to show off your craftiness, leave a comment or a picture!